

Note: Choosing not to block acrylic will not ruin your project.
Your finished piece might just have curled edges, uneven stitches, and a stiffer feel. This is okay for some items. For projects like garments and lace, blocking is the key step that creates the intended fit and a professional look. You can easily learn this skill. It is a simple way to elevate your crafting and make your work shine. ✨
What happens if you don't block acrylic?
You finished your project. Now you wonder if you can skip the final step. Skipping blocking won't destroy your hard work, but it does mean you miss out on some amazing benefits. An unblocked project often looks less polished than its full potential. Let's explore what happens when you decide not to block acrylic.
Stiff fabric and poor drape
Your unblocked acrylic project might feel stiff and rigid. The fabric will not hang or flow nicely. This lack of drape can make a sweater feel boxy or a scarf feel coarse and uncomfortable. Many crafters notice their finished acrylic items are stiff and even curl up, making them less pleasant to wear.
The magic of blocking comes from heat.
Acrylic is a type of plastic. Heat helps relax these plastic fibers.
This process allows the fibers to stretch and settle.
The fabric becomes softer and more flexible.
This change gives your project a beautiful, flowing drape.
Once you set the shape with heat, the change is permanent.
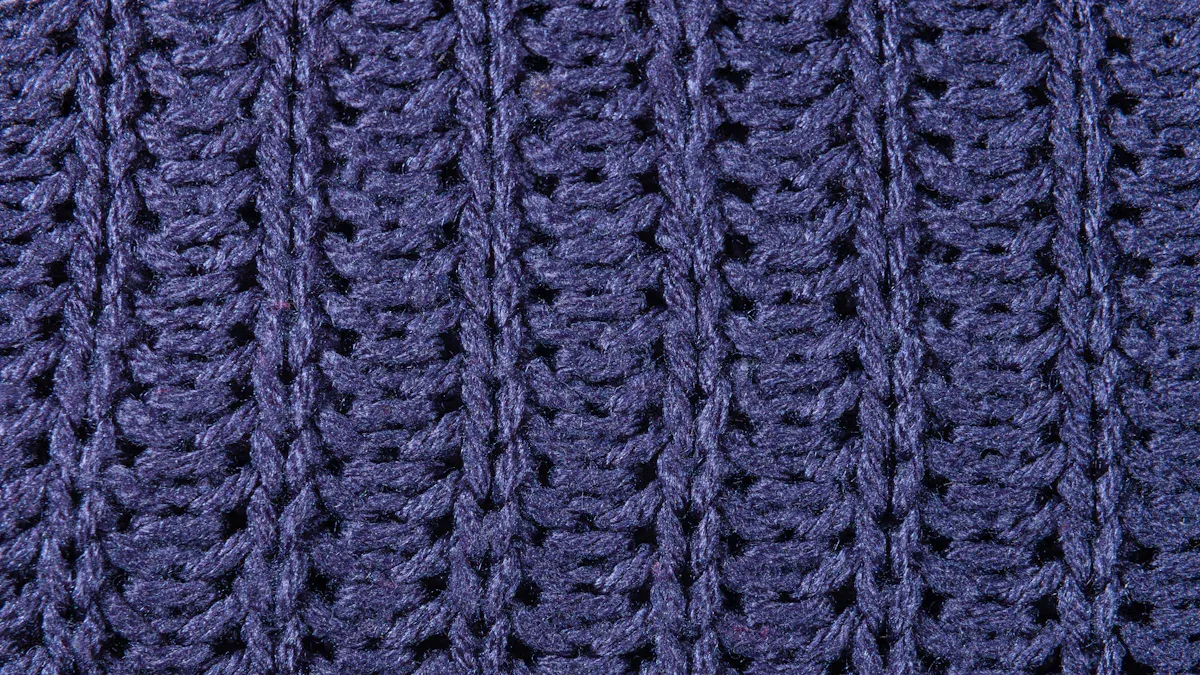
Undefined stitches and patterns
Your stitches might look a little cramped or uneven right after you finish. This can hide the beautiful texture of your stitchwork, especially in cabled or lace designs. The pattern you worked so hard on may not look as clear as you hoped.
Pro Tip: Steam is your best friend for making stitches pop! Gentle steam introduces both heat and moisture to the acrylic fibers. This process eases the fibers apart and helps them relax. As the stitches open up, your pattern becomes much more defined and visually appealing.
The heat from the steam sets the synthetic fibers into their new, relaxed position. This creates a lasting improvement in your project's appearance.
Curled edges and uneven shapes
Curling edges are a very common frustration in knitting and crochet. Your blanket corners might roll up, or the bottom of your sweater might refuse to lie flat. This happens for several reasons.
Tension Issues: Your tension might be too tight. This pulls the fabric inward and causes curling.
Stitch Patterns: Some stitches, like stockinette or single crochet, naturally want to curl.
Wrong Hook Size: A hook that is too small for your yarn creates tight stitches that are prone to curling.
Luckily, you can fix this. Steam blocking is an excellent technique to make your project lay flat. Adding a border with a flat stitch pattern can also help, but blocking is often the most effective solution for taming those unruly edges.
When not blocking is a problem
For some projects, skipping the blocking step creates noticeable issues. You might find your finished item is unwearable or looks incomplete. Let's look at specific cases where blocking is not just helpful, but necessary.
Garments that don't fit
You spent weeks making a beautiful acrylic sweater. You try it on, but the sleeves are too short and the body feels tight. An unblocked garment rarely matches the size you intended to create. The stitches are still compressed from the creation process. Blocking relaxes the fibers, allowing the garment to stretch to its correct dimensions. This final step ensures your hard work results in a sweater, cardigan, or top that fits you perfectly.
Unopened lace and openwork
Lace and openwork designs depend on space to show their beauty. Before blocking, your intricate shawl might look like a crumpled bunch of yarn. The delicate holes and patterns are hidden because the stitches are tight and undefined.
Blocking is like helping a flower bloom. 🌸 The heat and moisture persuade the stitches to open up, revealing the complex and airy pattern you worked so hard to create. Without it, the true beauty of your lace project remains hidden.
Seaming and how to block crochet squares
Joining pieces together can be a major challenge if they are not uniform. Blocking individual squares before you seam a project helps to evenly shape each piece. This extra step ensures your finished blankets and garments look much neater. Using a pegged blocking board is a great way to make all your squares the exact same size for a professional assembly.
Learning how to block crochet squares is simple. First, gather your materials.
Completed crochet pieces
A flat surface like a blocking board or a stack of towels
Rustproof pins
A spray bottle with tepid water
Once you have your supplies, you can follow these steps for perfectly square pieces:
Lay your squares on your flat surface.
Pin the first corner of a square.
Pin the corner diagonally across from the first one. Then, pin the other two corners.
Add pins to the center of each edge to make the sides straight.
Spray the squares thoroughly with tepid water.
Leave the pieces pinned until they are completely dry.
The right way: How to block acrylic yarn
You can master how to block acrylic yarn. The secret is understanding the material. Acrylic is a thermoplastic fiber. This means heat softens the plastic-based fibers, and they harden into a new shape as they cool. This process is permanent. Unlike natural fibers that have 'memory' and can be re-blocked, once you set acrylic with heat, the shape is locked in for good. This is why heat-based blocking methods are essential.
The power of steam blocking acrylic
Steam blocking is the best way to block acrylic. This technique uses a combination of heat and moisture to relax and set your stitches permanently. You will need a few tools before you start your steam blocking journey.
A large surface: Use foam blocking mats or a bed topped with towels.
Rust-resistant pins: T-pins are sturdy and easy to handle.
A steamer or steam iron: Your tool must produce steam without touching the fabric.
A test swatch: Always test steam blocking on a small swatch of the same yarn first.
Once you have your supplies, you are ready to begin steam blocking acrylic. Follow these steps for a perfect finish:
Pin your project to your blocking surface. Use a measuring tape to ensure you get the exact dimensions you want.
Turn on your steamer or iron and let it preheat. Use the lowest steam setting to start.
Hold the steamer 2 to 4 inches above your project. Never let the hot iron or steamer touch the yarn directly. This can melt, or 'kill,' the fibers.
Move the steamer slowly over the fabric. You will see the stitches relax and open up. The area should feel warm and slightly damp.
Work in small sections until you have applied steam to the entire project.
Let the project cool and dry completely. This can take several hours.
Once fully dry, you can carefully remove the pins.
What is 'killing' acrylic? Applying too much heat melts the acrylic fibers. This process, known as 'killing,' makes the yarn permanently limp, shiny, and extra drapey. It removes all the yarn's elasticity. While usually an accident to avoid, some crafters 'kill' acrylic on purpose to create a fabric with a unique, liquid-like drape for specific projects like shawls.
The process of steam blocking is very effective. Learning how to use steam blocking will transform your finished objects. You will find steam blocking acrylic is a game-changer. The steam blocking technique is simple. Your steam blocking results will impress you. Many crafters prefer steam blocking for its speed. You can achieve great results with steam blocking. The final step is to enjoy your beautifully finished steam blocking project.
Wet blocking for acrylic blends
You might have a yarn that is a blend of acrylic and a natural fiber like wool. In this case, wet blocking is a great option. This method is gentler than steam blocking and works well for fibers that respond to water. You can also use a lighter version of wet blocking called spray blocking. For spray blocking, you pin your item dry and then spray it with water. Full wet blocking involves soaking the item first.
Here is a simple guide to wet blocking:
Submerge your project in a basin of lukewarm water. Let it soak for about 20-30 minutes until it is fully saturated.
Gently squeeze the water out. Do not wring or twist the fabric, as this can stretch it out of shape. Roll it in a towel and press firmly to remove more excess water.
Lay the damp project on your blocking mats.
Pin it to your desired measurements.
Let it air dry completely.
The spray blocking method is very similar. You just skip the soaking step. Many people prefer spray blocking for smaller items. You can use spray blocking on many projects. The wet blocking and spray blocking methods are both useful. If you choose wet blocking, be patient. If you choose spray blocking, ensure even coverage. Both wet blocking and spray blocking are great skills. You will find wet blocking is easy. You will find spray blocking is also easy. The choice between wet blocking and spray blocking depends on your yarn and project.
Pinning for perfect shape
Proper pinning is the key to a professional finish, no matter which of the blocking methods you choose. The right tools make this step much easier and more effective. This is a crucial part of how to block crochet and knitted items.
Tool | Description | Why It's Great |
|---|---|---|
Interlocking foam squares, often with grid lines. | They are waterproof, allow for custom sizing, and the grids help you pin your project into a perfect square or rectangle. | |
T-Pins | Sturdy, rustproof metal pins with a T-shaped top. | The T-shape makes them easy to push into mats and remove. They are strong enough to hold tension without bending. |
Knit Blockers | Plastic handles with several sharp pins embedded in a row. | They speed up the process of pinning straight edges on large projects like blankets and shawls, saving you significant time. |
When you pin your project, start with the corners. Gently stretch the fabric to the desired dimensions, securing each corner first. Then, add pins along the sides to create straight, even edges. This attention to detail during the pinning stage is what transforms a homemade item into a polished, professional-looking piece.
When it's okay to skip blocking
You have learned why blocking is important. Now, let's talk about when you can skip this step. Blocking is not a requirement for every single project you make. Sometimes, the nature of the item itself provides all the structure it needs. Knowing when to skip blocking saves you time and effort.
For sturdy 3D items like amigurumi
You do not need to block your adorable, three-dimensional creations like amigurumi. These projects get their shape and stability from a different source.
Stuffing is the key: The fiberfill stuffing you use pushes the fabric outward. This process defines the shape and smooths out the stitches from the inside.
Structure from construction: You create amigurumi with tight stitches to prevent the stuffing from showing. This dense fabric is already firm and holds its shape well.
Blocking a stuffed animal or toy would be an unnecessary step. The stuffing does all the work for you, ensuring your cute creature looks exactly as you intended. Saving time on this step means you can start your next fun project even sooner! 🧸
For projects with natural structure
Some projects have a built-in structure because of the stitch patterns you use. These stitches create a balanced fabric that naturally lies flat and resists curling. You can often skip the step to block acrylic when using these types of stitches.
Stitch patterns like garter stitch (knitting every row) and seed stitch (alternating knit and purl stitches) are great examples. They distribute yarn tension more evenly than a pattern like stockinette stitch. This balance helps prevent the edges from rolling up.
While these textured stitches reduce curling, it is good to remember that acrylic yarn does not respond to blocking as effectively as natural fibers anyway. For projects like thick scarves, dishcloths, or sturdy blankets made with these stitches, the fabric already has the stability it needs. The item will look great right off your needles or hook without any extra work.
You learned that you do not have to block acrylic. It is a missed opportunity for a better project. Blocking is essential for a professional finish on garments and lace. You can easily learn this skill. We encourage you to experiment with steam blocking. The process of steam blocking is permanent and simple. Your steam blocking results will impress you. Learning steam blocking is a great way to make your projects look their best. Try steam blocking today! 🚀
FAQ
Can I re-block acrylic yarn?
You cannot re-block acrylic yarn. The heat from steam blocking permanently sets the plastic fibers. Unlike natural fibers, acrylic does not have a "memory" to return to its old shape. Your first block is the final one, so make sure you get the shape right.
What is the difference between wet blocking and steam blocking?
Wet blocking uses water to soak the yarn before pinning. Steam blocking uses heat and moisture from a steamer or iron.
For 100% acrylic yarn, steam blocking is the best method. You should use wet blocking for yarns that are a blend of acrylic and natural fibers like wool.
What happens if I melt my yarn with steam blocking?
If you touch the hot iron to the yarn, you will 'kill' it. The fibers melt, becoming permanently limp and shiny. This action cannot be undone. Always keep your steamer a few inches away during steam blocking to avoid this.
Is wet blocking effective for 100% acrylic yarn?
Wet blocking is not very effective for pure acrylic projects. Acrylic fibers do not absorb water like natural fibers do. Heat is necessary to relax and shape them. This is why steam blocking works so well for setting the final shape.
See Also
Understanding Acrylic Blocks: Essential Features, Uses, And Key Applications
Busting Acrylic Tray Myths: Simple DIY Ideas For Creative Home Decor
Acrylic Aquariums Explained: Discover Their Unique Features And Practical Uses
Anti-Static Acrylic: Principles, Properties, And Diverse Applications Unveiled
Cast Acrylic Sheets: Defining Their Properties And Versatile Industry Applications
