

An acrylic block is a clear, reusable handle for your unmounted stamps. This essential stamping block lets you see exactly where you place an image, ensuring perfect results every time. You are part of a huge crafting community!
Did You Know? 🧐
Over 4 million people in the United States use various types of stamps.
More than 4% of all Americans own stamps in their crafting kits.
Using acrylic stamp blocks and clear acrylic blocks makes stamping simple and precise for crafters of all levels.
Why you need an acrylic block
You might wonder why this simple tool is so important. An acrylic block is the key to unlocking the full potential of your unmounted stamps. It provides a stable handle, ensures perfect placement, and helps you get a clean impression every single time. These are the main advantages of using acrylic blocks in your craft projects.
For mounting clear stamps
Your clear acrylic stamps do not have a built-in handle. They are flexible pieces of polymer that need a firm support. This is where clear acrylic blocks come in. The stamps naturally cling to the smooth surface of the block without any adhesive. You can easily peel one stamp off and place another one on. This makes switching between different stamps for a project quick and effortless.
For precise image placement
Have you ever struggled to place a stamped image exactly where you want it? Clear acrylic blocks solve this problem. Their transparency is a game-changer compared to traditional wood-mounted stamps.
You can see right through the block and the stamp! This lets you position your design with complete accuracy before you even apply ink.
This visibility is crucial for creating professional-looking cards and crafts.
You can see the exact placement on the paper.
You avoid the guesswork common with opaque wood stamps.
You achieve precise alignment for all your stamps.
For applying even pressure
A firm, flat surface is essential for a perfect stamped image. An acrylic block provides a rigid handle, helping you apply consistent pressure across the entire surface of your stamps. Uneven pressure can cause several problems, such as parts of your image appearing faint or incomplete. Using a block ensures the center and edges of the stamp receive equal force. This simple step guarantees you get a crisp, bold, and complete impression from your stamps every time you use them.
How to use acrylic blocks for perfect stamping
Knowing how to use acrylic blocks correctly will transform your crafting projects. You can achieve professional results with just a few simple techniques. This guide will walk you through selecting the right tools and mastering the stamping process.
Choosing the right size
You need the right tool for the job. Your acrylic block should always be slightly larger than the stamp you are using. This gives you a clear view of the stamp's edges. You should avoid a block that is too large. An oversized block can be difficult to handle and may pick up stray ink.
Many crafters invest in a variety of different-sized clear acrylic blocks for convenience. If you are just starting out, a good medium-sized block can handle most of your stamps.
Budget-Friendly Tip 💡 The most versatile sizes to start your collection are typically labeled C, D, and H. These three blocks will allow you to mount the majority of your stamps. You can even find printable size templates online to help you match your stamps to the correct block.
Key features: Grids and grips
Many clear acrylic blocks offer helpful features. The most common feature is a set of etched gridlines. These grids are designed to help you align your stamps with precision. The lines let you place your stamp perfectly straight on the stamping block. This is especially useful when you are spelling out words or creating repeating patterns.
You may also find blocks with curved or scalloped edges. These ergonomic grips make the block more comfortable to hold. This gives you better control as you press your image onto the paper.
A step-by-step stamping guide
You are ready to create a perfect impression. Learning how to use acrylic blocks is easy when you follow a few key steps.
Mount Your Stamp. Place your stamp onto the flat side of the acrylic block. The polymer will cling to the surface naturally. If your stamp is new, condition it first by stamping it on scrap paper a few times. This removes any residue and helps the ink apply evenly.
Ink Your Stamp. Lay your block on your work surface with the stamp facing up. Gently tap your ink pad onto the surface of the stamp. Do not press the stamp into the pad. Tapping gives you even ink coverage without overloading the edges.
Position and Press. Look through the block to position your design exactly where you want it. Press straight down with firm, even pressure. Do not rock the block back and forth. Rocking can cause blurry lines or an uneven image.
Lift Straight Up. Once you have applied pressure, lift the block straight up. This clean motion prevents the image from smudging.
For larger stamps, you can stand up to get better leverage and apply more even pressure across the entire design.
Sometimes, you might not get the perfect result on your first try. Here is a quick guide to fix common problems.
Problem | Likely Cause | Solution |
|---|---|---|
Blurry or Smeared Image | Too much ink or rocking the block | Use less ink and press straight down. |
Faint or Patchy Image | Not enough ink or uneven pressure | Re-ink your pad and apply even pressure. |
Incomplete Impression | Uneven surface or debris on the stamp | Stamp on a flat surface and clean your stamps. |
More than just a handle: Creative uses
Your acrylic block is more than just a handle for your stamps. You can use this versatile tool for several creative techniques that go beyond basic stamping. These methods will add unique textures and professional touches to your projects.
Creating ink backgrounds
You can turn your block into a giant stamp to create beautiful, abstract backgrounds. This is a popular technique for card making. It gives you a custom base for layering smaller stamps and embellishments.
Watercolor Smooshing Technique 🎨 This method uses dye inks to create a soft, blended look. It is perfect for backgrounds where you will add other stamps later.
Apply Ink. Press your ink pad directly onto the flat surface of your acrylic block. You can use one or more colors.
Add Water. Lightly spritz the ink on the block with water from a small spray bottle. The water will make the ink bead up and blend.
Press to Paper. Press the inked block onto your paper. Hold it for a moment and then lift it straight up. You will have a unique, watercolor-style background.
You can also use the thin edge of your block to create patterns. Ink the edge and press it onto your paper to make crisp stripes or build a plaid design for your cards. This is a great way to use the block itself as one of your primary stamps.
As a decorative display piece
Your thicker blocks can find a new purpose around your home or studio. Their clear, solid design makes them excellent display pieces. You can use them in many ways.
Use a heavy block as a stylish paperweight on your desk.
Display small collectibles, figurines, or jewelry on top of them.
Place a photo behind a thick block to create a modern, frameless picture holder.
Elevate small art pieces or sculptures for a gallery-style look.
These blocks provide a stable and elegant base that makes your treasured items stand out.
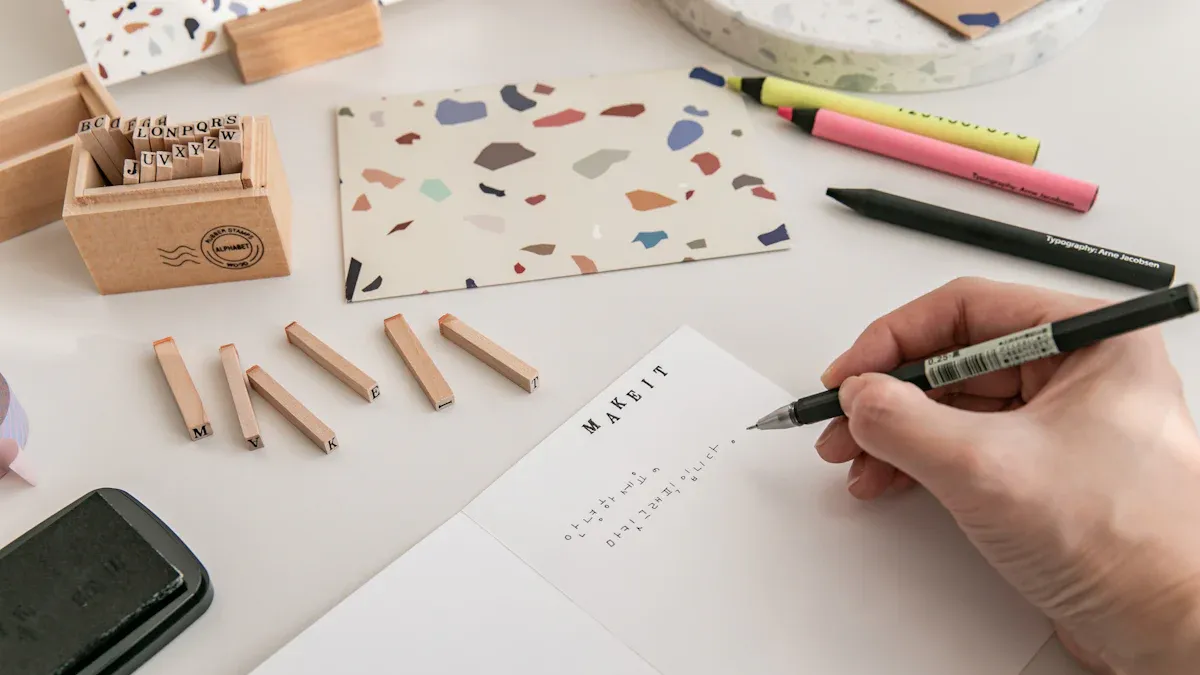
For applying sticker guides
The features that make a block great for stamps also make it perfect for applying stickers. The clear body and gridlines help you achieve perfect placement every time. You can arrange letter stickers on the block to spell a word. Then, look through the block to position the entire word perfectly on your project before pressing it down. This technique prevents crooked letters and ensures your sentiments are perfectly aligned.
Care and maintenance for your clear acrylic blocks
Proper use and care of acrylic blocks will keep them in great condition for years. You invested in these tools, so you want them to last. Taking a few simple steps to clean and store your clear acrylic blocks will protect their clarity and function, ensuring you get perfect results with your stamps every time.
Cleaning your blocks properly
You should clean your blocks after every crafting session to prevent ink buildup. For most inks, a simple wipe-down is all you need.
Basic Cleaning: Use mild soap and water with a soft cloth. This is the safest and most effective method for daily cleaning.
Approved Cleaners: For extra sparkle, you can use products like Windex® or Fantastik®. Some crafters even use a bit of furniture polish to make future cleaning easier.
Stubborn Stains: For permanent inks, you may need an archival ink cleaner. Gently scrub the block with the cleaner and a soft toothbrush to lift the stain.
Important Warning ⚠️ Do not use cleaners that contain alcohol or ammonia. These harsh chemicals can weaken the plastic and cause tiny surface cracks called "crazing." Always stick to gentle, approved cleaning solutions.
Storing blocks to prevent scratches
How you store your clear acrylic blocks makes a big difference. Scratches can obstruct your view and make precise stamping difficult. You can store your acrylic block flat on a level surface or vertically like a book. To prevent damage, wrap each block in a soft cloth or place a piece of felt between them if you stack them. Avoid placing heavy objects on top of your blocks. Choose a cool, dry storage location to prevent any warping over time.
Restoring a non-sticking stamp
Sometimes, your stamps may stop clinging to the block. This usually happens because oils from your hands or dust have built up on the stamp. Restoring the cling is very easy. Simply wash your stamps with mild soap and warm water, then let them air dry completely. This removes any residue and makes them sticky again, ready for your next project.
You can see an acrylic block is an indispensable tool. It helps you mount your stamps, achieve perfect placement, and create unique backgrounds. Proper care ensures your clear acrylic blocks will last for over a decade. These clear acrylic blocks are a secret weapon for your stamps. We encourage you to try these techniques for your next stamping and card making project. You will elevate your crafts with this simple, versatile tool.
FAQ
Can I use any stamp with an acrylic block?
You can use unmounted stamps with your block. Clear polymer and cling rubber stamps work perfectly. They naturally stick to the block's surface. Wood-mounted stamps already have a handle, so you do not need a block for them.
Why won't my stamp stick to the block anymore?
Your stamp likely has dust or oils on it. This buildup prevents it from clinging. You can easily fix this. Just wash the stamp with mild soap and warm water. Let it air dry completely to restore its natural stickiness.
Do I need a block for every stamp size?
You do not need a block for every size. However, owning a few different sizes is very helpful. A small, medium, and large block will cover most of your stamping needs. Always choose a block slightly larger than your stamp for the best results.
What's the difference between a stamping block and a platform?
An acrylic block is a simple, clear handle for your stamps. A stamping platform is a larger tool with a hinged lid. It lets you re-stamp an image in the exact same spot. This feature is great for fixing mistakes or creating darker impressions.
See Also
Acrylic Blocks: Understanding Their Definition, Features, and Practical Uses
Busting Acrylic Tray Myths: Simple DIY Ideas for Creative Home Decor
Your Comprehensive Guide to Choosing and Using Acrylic Table Stands
Acrylic Risers Explained: Definition, Key Features, and Diverse Applications
Acrylic Watch Displays: Definition, Structural Insights, and Practical Uses
