

A physical sample is your best defense against costly mistakes on bulk display case orders. Requesting samples lets you test what truly matters before committing. You should focus your evaluation on three core pillars:
Material Quality
Dimensional Fit
Structural Integrity
This practical checklist empowers you to approve your purchase order with total confidence.
Plan Your Display Before Requesting Samples
Before you start requesting samples, a solid plan is essential. This initial step ensures you ask for a product that truly meets your needs, saving you time and money. A clear vision for your display will guide every decision you make, from material choice to supplier selection.
Assess Your Collection and Space
First, take a close look at what you want to display and where you will put it. Measure your collectibles carefully. Then, measure the physical space where the cases will go. Think about the room's layout to avoid a cramped or cluttered look. You should also consider the environment.
Lighting and Traffic: Place delicate items away from direct sunlight to prevent fading and keep them clear of high-traffic areas to avoid accidental bumps.
Future Growth: Will your collection expand? Think about modular display options that allow you to add more cases later while maintaining a consistent look.
Visual Impact: Decide which items are your focal points. Arranging your display to complement the room's aesthetic will make your collection stand out.
Define Your Case Specifications
Once you understand your space and needs, create a detailed specification sheet. This document will clearly communicate your requirements to potential suppliers. It should include the exact dimensions, but also specify key features. For example, acrylic is a great material because it is often clearer than glass, more shatterproof, and lighter. You can also request features like UV protection to prevent your items from fading or magnetic lids for a secure, crystal-clear closure. For heavier items, a thicker acrylic of 5 to 6 millimeters provides better support. A detailed spec sheet ensures potential suppliers understand exactly what you need.
Choose the Right Supplier
Finding the right partner is crucial. Look for suppliers with a proven track record of quality and reliability. You can check customer reviews on sites like Trustpilot to see what others are saying about their products and service. When evaluating suppliers, consider these points:
Material Expertise: Do they understand materials like acrylic and meet industry standards? Ask for compliance documentation.
Customization: Can they build cases to your specific size and feature requirements?
Quality Control: Requesting samples is a key part of this, but you can also ask about their quality control processes.
Reliability: Check their on-time delivery rates and ask about their warranty and replacement policies. A minimum 12-month warranty is a good benchmark.
A thorough plan makes the process of requesting samples much more effective, bringing you one step closer to the perfect display for your collection.
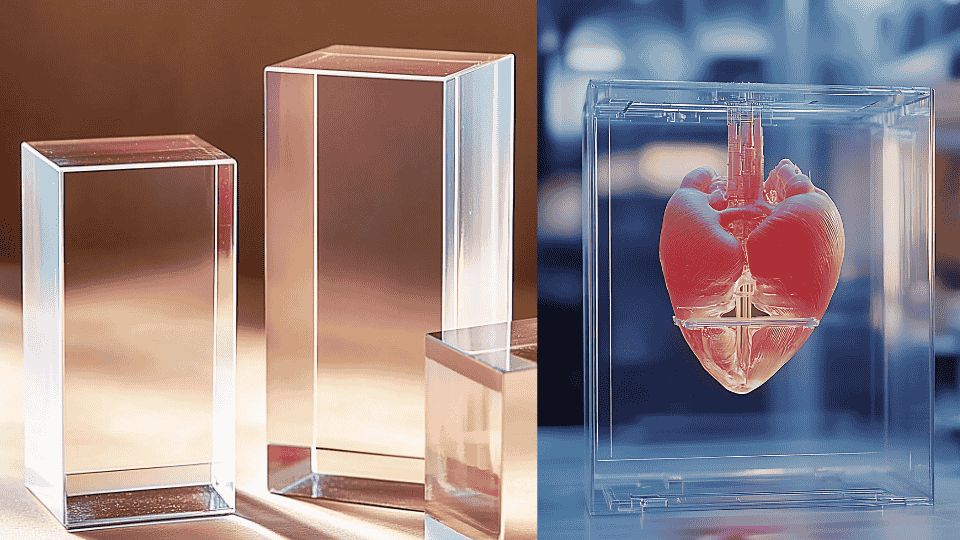
Test Material Quality and Clarity
Once your sample arrives, you can begin the most important step: testing. The quality of the material directly impacts the look and longevity of your display. You need to check the acrylic's grade, clarity, and protective features to ensure it meets your standards.
Verify Acrylic Grade and Thickness
First, you should confirm the type of acrylic used. High-quality cases use 100% virgin acrylic, which is clearer and more durable. Recycled acrylic can sometimes have a slight yellow tint. Ask your supplier if they use high-grade cast acrylic, which offers excellent stability.
Next, verify the thickness you requested. Use a pair of digital calipers for an exact measurement. The right thickness provides the necessary structural support for your collectibles. For smaller cases, a minimum of 3mm is standard, while larger or heavier items may require 5mm or more.
Tip: Thicker acrylic provides greater durability but also increases the cost. This table shows how thickness affects a case's strength and price.
Thickness | Durability Impact | Cost Impact | Common Uses |
|---|---|---|---|
3mm (1/8") | Low to Moderate | Lowest | Small cases, picture frames |
4.5mm (3/16") | Moderate | Moderate | Medium-sized displays |
6mm (1/4") | Moderate to High | Moderate to High | Larger cases, robust shelving |
9mm (3/8") | High | High | Heavy-duty display cases |
Inspect for Optical Imperfections
Your display case should offer a crystal-clear view of your collectibles. To check for clarity, hold an acrylic panel against a pure white background. This will reveal any yellowing. Then, hold it against a black background under a bright light. This helps you spot any internal imperfections.
Look for tiny bubbles trapped inside the material.
Check for fine scratches or scuffs on the surface.
Ensure there are no hazy spots or distortions.
These flaws can distract from the item on display, so it is important to catch them early.
Confirm UV Protection Levels
For valuable collectibles like trading cards or signed memorabilia, UV protection is critical. Harmful UV rays can cause colors to fade over time. Premium cases should block up to 99.9% of UV light. Ask your supplier for a technical data sheet that confirms their UV protection claims. You can also perform a simple test at home. Look for "UV400" on the product label, which indicates it blocks all UVA and UVB rays. Alternatively, you can shine a UV flashlight through the panel onto a UV-sensitive surface to see if any light passes through.
Check Dimensional Accuracy and Fit
A beautiful case is useless if your collectible does not fit inside. After checking the material, your next step is to confirm the sample’s dimensions are perfect. This ensures your final order will house your items exactly as planned.
Measure All Internal Dimensions
You must always measure the usable space inside the case, not the outside. The thickness of the acrylic adds to the external size, which can be misleading. For the highest accuracy, use a precision tool like a digital caliper instead of a standard tape measure.
Follow this standard process to record your measurements:
Length (L): Measure the longest internal side at the base.
Width (W): Measure the shorter internal side at the base.
Height (H): Measure the internal space from the bottom to the top.
Always write down the dimensions in Length x Width x Height format and specify your unit of measurement (e.g., inches or millimeters).
Perform a Live Fit-Test
Now for the most important test: place your collectible inside the sample case. The item should fit comfortably without being too loose or too tight. Check the clearance on all sides.
Pro Tip: 📏 A perfect fit includes a small buffer. You should aim for about 1/8 to 1/4 inch of extra space around the item. This small gap makes it easier to place and remove your collectible without risking damage. It also accounts for any tiny variations in the final production run.
Confirm Agreed-Upon Tolerances
No manufacturing process is perfect down to the micron. A "manufacturing tolerance" is the small range of acceptable deviation from the specified dimensions. For example, cast acrylic often has a wider thickness tolerance than extruded acrylic. You should discuss and agree upon these tolerances with your supplier before you even receive the sample.
Check that your sample falls within the agreed-upon range. If a dimension is off, reference the tolerance details in your specification sheet when you provide feedback. Clear communication on this point ensures the final batch of cases will meet your functional requirements.
Evaluate Structural Integrity and Finish
A display case must be strong and look flawless. You need to check how the sample is built and finished. This step ensures your final cases will be durable and beautiful.
Examine Seams and Joint Strength
The seams hold your case together, so they must be strong. Suppliers often use special methods to create clear, bubble-free joints.
UV-Bonded Seams: An adhesive is cured with UV light to create a clear, strong bond.
PS-30 Seams: A two-part adhesive fills any gaps for a durable, invisible look.
You can test the joint strength yourself. Place the case on a flat surface. Apply gentle but firm pressure to the seams and corners with your hands. The case should feel solid. You should not see any flexing, hear any creaking, or feel any movement in the joints. A sturdy case will not wobble under pressure.
Inspect Edge Polish and Finish
The edges of the acrylic panels contribute to the case's overall quality. High-quality cases have smooth, transparent edges. Run your finger along the edges to check for sharpness or rough spots. Look for a crystal-clear finish, not a cloudy or yellowed one. Suppliers use different polishing methods, which affect the final look and durability.
Diamond vs. Flame Polishing Diamond polishing offers the best quality. Flame polishing is faster but can make the acrylic weak against certain cleaners.
Feature | Diamond Polishing | Flame Polishing |
|---|---|---|
Finish | Highest transparency | Shiny but less clear |
Durability | Very strong and durable | Can crack ("crazing") with alcohol cleaners |
Quality | Premium, flawless look | Good, but has weaknesses |
Test Lids, Magnets, and Assembly
Finally, test all the moving parts. If your case has a lid, open and close it several times. It should move smoothly and fit securely without being too tight. If the lid uses magnets, check that they are strong enough to hold it in place. The lid should not slide off if you tilt the case slightly. If your case requires any assembly, make sure the parts fit together easily and the instructions are clear. This ensures you can set up your final order without any frustration.
Final Approval and Communication
You have tested the sample thoroughly. Now it is time for the final steps. This phase involves evaluating the packaging, reporting your findings, and making a final decision on your order.
Assess Shipping and Packaging
How your sample arrived tells you a lot about the supplier. The packaging should protect the case from damage during transit. A well-packaged sample shows the supplier cares about delivering a perfect product.
Check for these key packaging materials:
A sturdy, double-walled cardboard box.
Multiple layers of bubble wrap or foam inserts.
Corner protectors to guard the edges.
"Fragile" or "Handle with Care" labels on the box.
If the sample arrived safely, you can feel more confident about your bulk shipment.
Document and Report All Findings
You need to create a clear and simple report for your supplier. This document will be the basis for your final decision. Use a consistent format and plain language so everyone understands.
Tip: 📸 A picture is worth a thousand words. Include photos or short videos to show any issues you found, like a scratch on the acrylic or a gap in a seam. This visual evidence helps the supplier understand the problem quickly.
Your report should include a summary of your findings for each test. List what passed and what failed. Be objective and provide specific details for any problems you discovered.
Approve the PO or Request Revisions
This is the final step. Based on your report, you have two choices.
Approve the Purchase Order (PO): If the sample meets all your specifications, you can give your formal approval. You send a confirmation to the supplier, and they can begin production on your full order.
Request Revisions: If you found problems, send your detailed report to the supplier. Clearly explain the changes needed for the case to meet your standards. Good communication here is key. The entire purpose of requesting samples is to fix issues before the main production run.
Requesting samples is your best strategy for a perfect order. You can confirm quality by checking these key points:
UV Protection & Material Clarity
Dimensional Accuracy & Collectible Fit
Joint Strength & Edge Finish
Shipping & Packaging
A thorough review ensures the final cases will protect your valuable collectibles.
Final Tip: 💡 Never feel rushed to approve a sample. Clear communication and careful testing are the keys to a successful partnership with your supplier.
FAQ
What if a supplier charges for a sample?
You should expect to pay for samples. Many suppliers credit this cost toward your final purchase order. Think of it as a small investment. It ensures the quality of your much larger bulk order and prevents expensive mistakes.
How long does the sample process take?
The timeline can vary. A standard sample might ship in a few days. A custom case may take several weeks for production and delivery. You should ask your supplier for an estimated timeline when you make your request.
What should I do if the sample has minor flaws?
You must document every flaw, no matter how small. Take photos and add them to your report. You should communicate these issues clearly to your supplier. This ensures they correct the problems before starting the main production run.
Should I test samples from multiple suppliers?
Yes, you should test samples from two or three top suppliers. This allows you to compare their material quality, finish, and packaging directly. You can then choose the partner who best meets your standards for the final order.
